Lesson 7: Understanding PerspectiveIt would seem that the easiest mod to do would be to cut and paste an image from outside of the game into the game's image maps. However, most images you find online (or elsewhere) will be taken at eye-level. Meaning, you are looking directly at them. In the game, we have an overhead view. These different viewpoints are called "perspective," the angle at which you see something. So, you will find that if you just paste another image in, it will often look out of place, like it doesn't belong. That's usually because the perspective is wrong.
I will demonstrate this with a tiger print for the wall. If you follow along with this portion of the tutorial, remember to delete your wall hanging before importing your room into the game, because in the game, the "paintings" will be on the wall in the place I am going to use.

The image you choose will most likely be too large. So your first step before even copying it will be to scale it down. Use Image -> Scale Image and choose a size as close as possible to the size you think you will need in the game. Now use Edit -> Copy and go to your newly created layer and use Edit -> Paste. Use the Move Tool to get the top left corner of the pasted image as close as possible to where it will be. If your size is still not correct, use the Scale Tool to fix it.
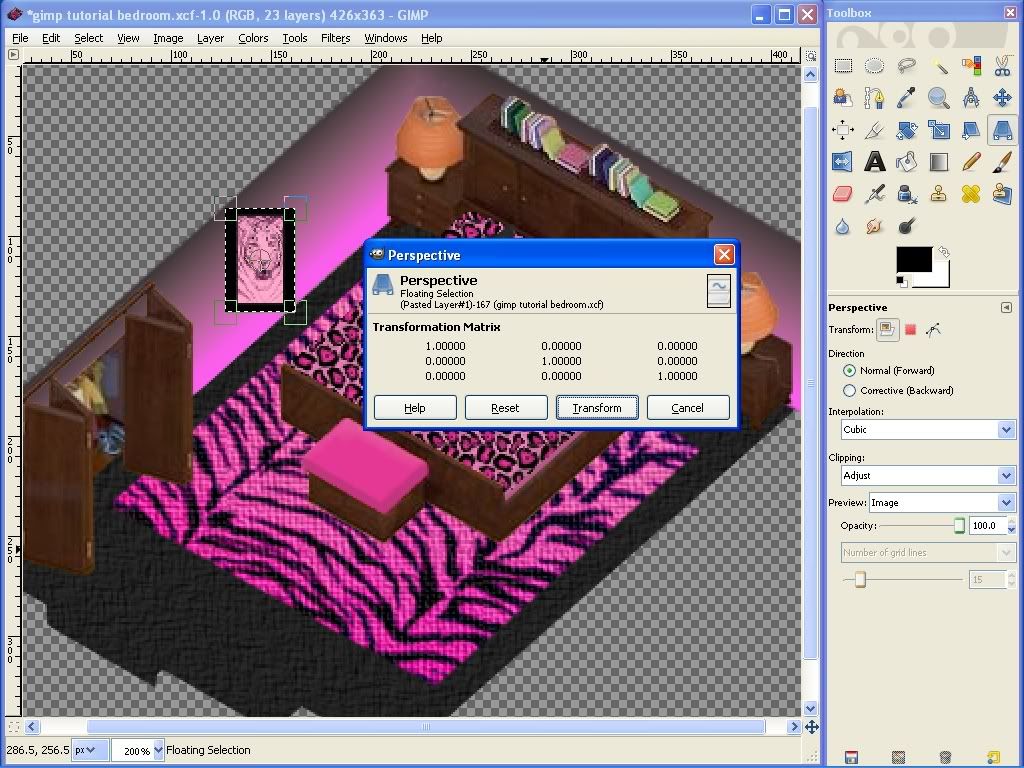
Now choose the Perspective Tool from the toolbox. Click once onto the pasted image to get the Perspective pop up box open. (Click and drag on the bar at the top of the window to move it out of your way, if necessary.) You will notice the "handles" (they look like squares) at the corners of the selection. We will use these to adjust the perspective.
I will use the wall edge as a guide. Because the top left corner is at the wall edge, I will begin with the top right corner. Click and drag the handle for that corner into place.

Next, do the bottom right corner. You will know it is correctly aligned with the top right when the line between them is straight and not jagged.
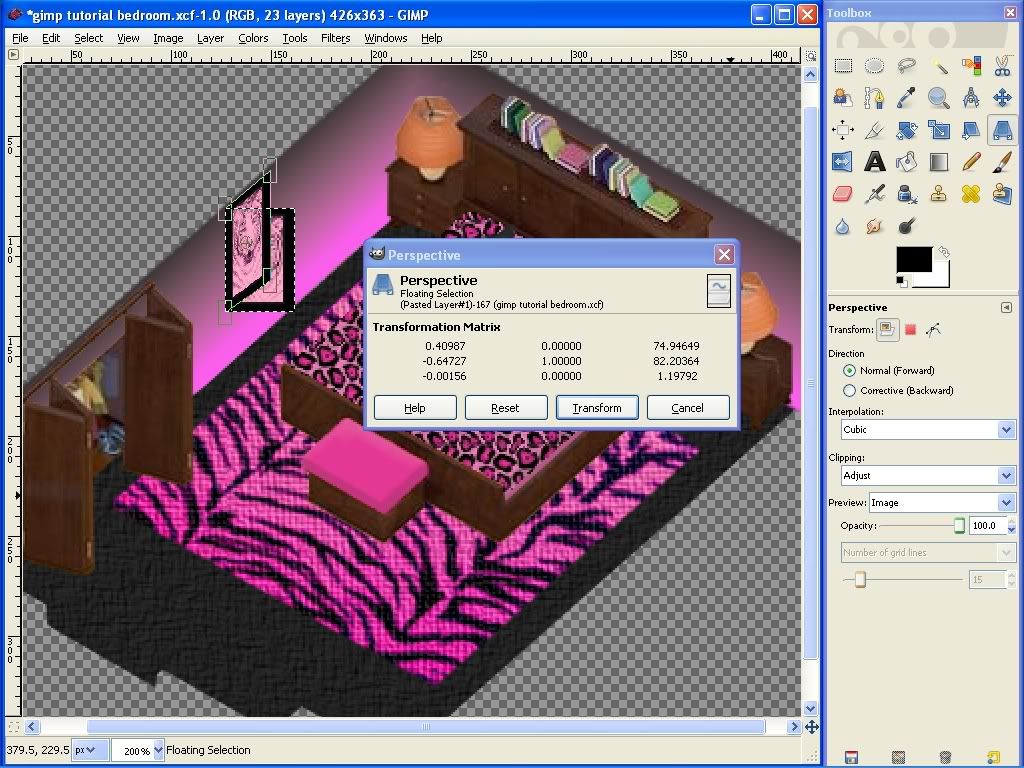
When the perspective appears to be correct, click the "Transform" button on the pop up window to finalize the changes. Use the Move Tool to place the picture where you want it. Don't forget to save your work.
You now know enough to finish decorating your room. Use colors, colorize, textures, patterns, gradients, shading and the other techniques you have learned to decorate the lampshades and bases, recolor the furniture, or closet door if you wish.


 Previous Topic
 Index
Index