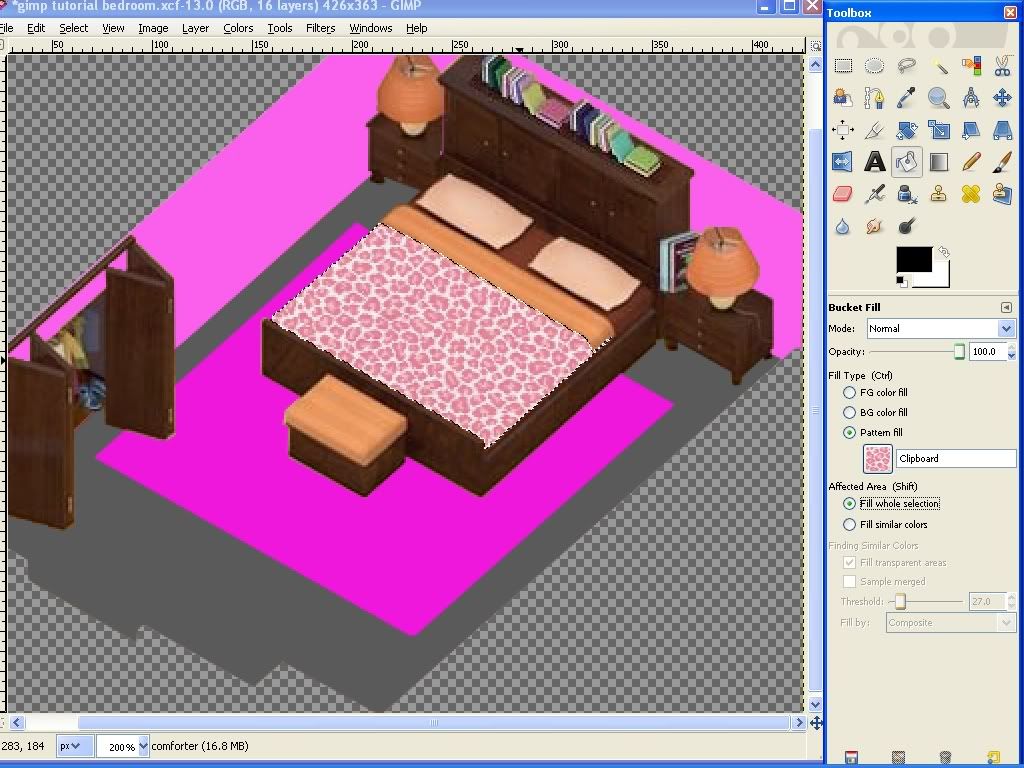
Lesson 4: Begin with the Room's FocusBecause the bed is the focus of this room, I will begin with it. First, choose a pattern for your new comforter. You can use one of the patterns that came with GIMP or find one online. Select the bucket fill tool and change Fill type to Pattern fill. Click the colored square to open the pattern menu. You will see all patterns that are currently installed. To install a new pattern, simply open it with GIMP and use Save As to save it with the .pat file extension. Then refresh your pattern menu or restart GIMP to have the pattern appear in your menu. Alternatively, you can use anything on the clipboard as a pattern. Just choose the first square in the pattern menu after you have copied the pattern you want to the clipboard.
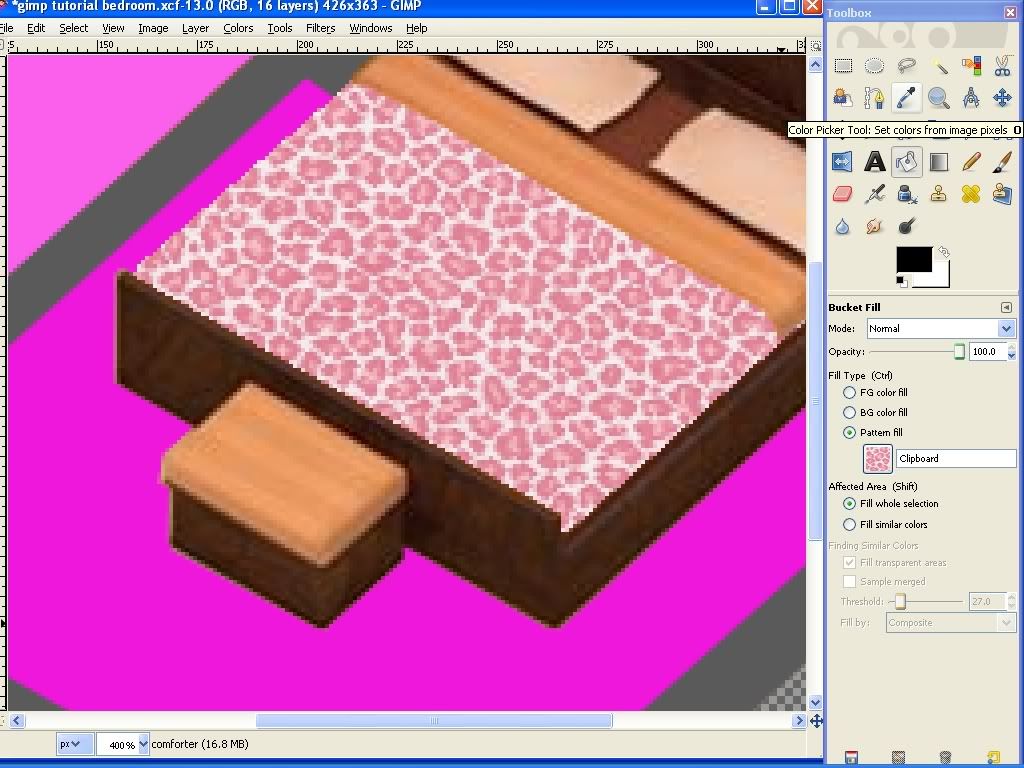
I will be using a pink leopard print for my daughter's bed. Choose your comforter layer and use the bucket fill tool to color it with your desired pattern. If you want the sheet fold to be a different color, remember to create a separate layer for it in the steps above. On the comforter layer, use the magic wand selection tool and just click anywhere off the comforter. You have just selected the transparent area around the comforter. Because this is the opposite of what we want, use Select -> Invert Selection to reverse it. Now you can use the bucket fill tool to fill the entire selection with your new pattern.
I want the sheet fold to have one of the colors in my pattern. I will use the Color Picker Tool to "grab" that color from this layer before moving to the sheet fold layer.
Use the same procedure to select the sheet fold. If we use the bucket fill tool to fill the sheet fold, we lose all the shading that makes it appear folded. So, now that we have a reference color to go by, I will show you how to use Colorize to recolor a selection.
With the sheet fold selected, use Colors -> Colorize. There are 3 settings. Hue is the main color. Saturation is the amount of that color that will be used. and Brightness is the lightness or darkness of the color (the shade.)
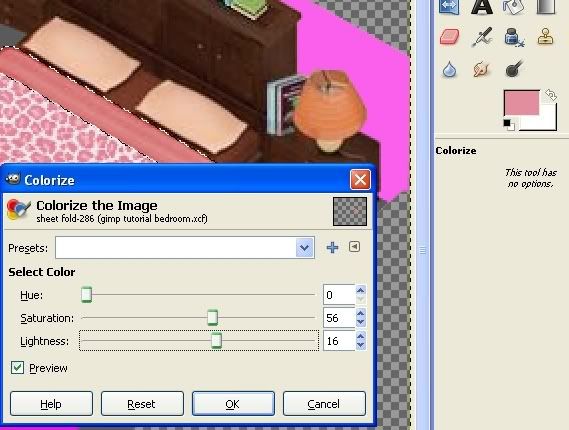
Begin with the hue and adjust it as close as possible to the color you are wanting. Make sure the preview box is ticked so that you can see the changes as you are adjusting. Next adjust the saturation. The higher number indicates more color, while a lower number will have less color and will be more gray. Finally, adjust the brightness. Keep playing with these settings until you have the color you want. You can see on the preview how the shading of the original sheet fold remains in place. Don't forget to save your work.
I will color the pillows with the same pattern I used on the comforter. You can use your pattern or use colorize to recolor them as you like. I want to make the pillows a bit larger, so I will select them one at a time and "scale" them to the size I want. Again, use the Fuzzy select tool and invert selection so that you have the pillows selected. Now use the Free select tool and set it to Subtract from the current selection. Use it to remove one of the pillows from the selection.
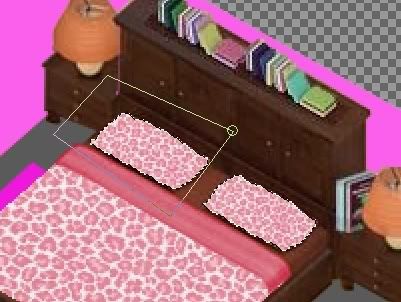
Choose the Scale Tool from the toolbox. Click once on the selected pillow and the scale tool options will appear. You can adjust the size in this window, or simply click on the image and drag.
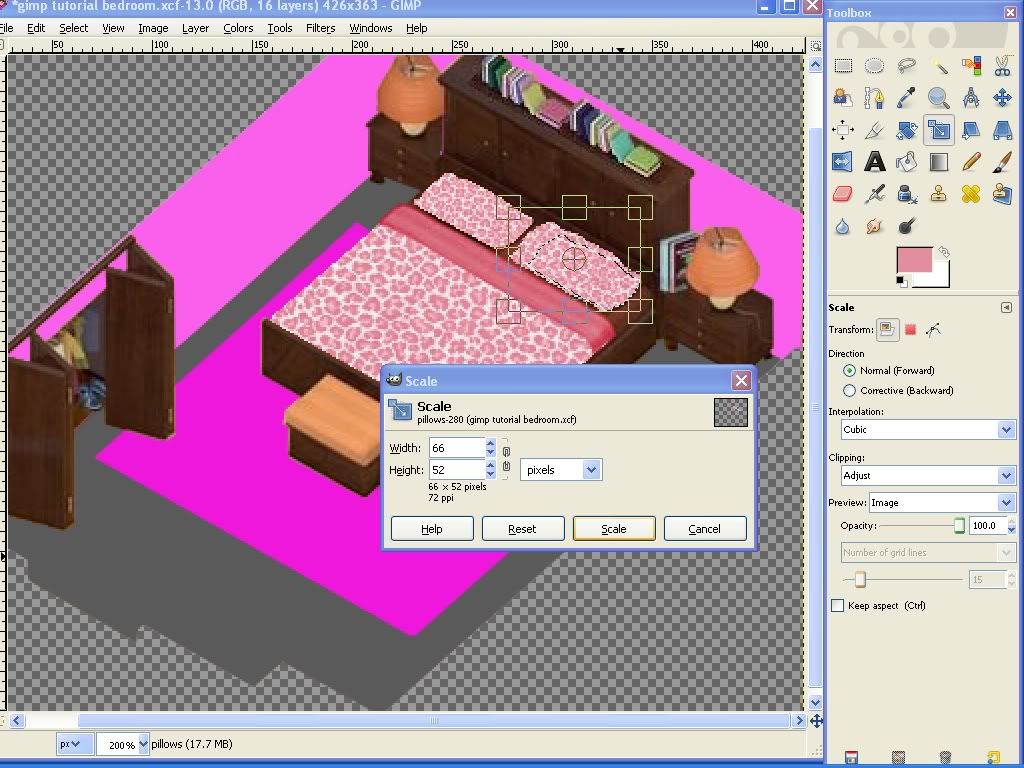
If necessary, use the Move Tool to reposition the pillow so that it is where you want it. To use it, just click on the selection and drag it into place. Repeat this procedure for the other pillow. Remember to save your work.
Hopefully, you are beginning to see your bed take shape. By now you are probably realizing that the bottom sheet does not match your new bedding at all and you want to change it. However, we didn't make a layer for it. So, we should do that now. Use the Layer menu to select your Background or Pasted layer and move it to the top. Select the bottom sheet area, remembering that the sheet fold and pillows will be on top of it. Use Edit -> Copy. Now return the background layer to the bottom using the Layer menu. This is the only keyboard shortcut I will teach you. :P Use Page Up and Page Down to go through your layers until you are above your bedframe, but below your comforter. That is where the bottom sheet would be, so that is where we will put its layer. A new layer is always created on top of the layer you are currently on. Choose the bed frame layer and create a new layer using the Layer menu. Use the skills you have learned above to color the sheet with bucket fill or colorize before anchoring it into place. Remember to save your work.


 Previous Topic
 Index
Index