Lesson 1: Creating the Background MapAt this point, you have GIMP downloaded and installed and you are ready to begin creating your own mods for Virtual Families. The first thing you want to do is create a new map, so that you can see all the rooms and yard at once.
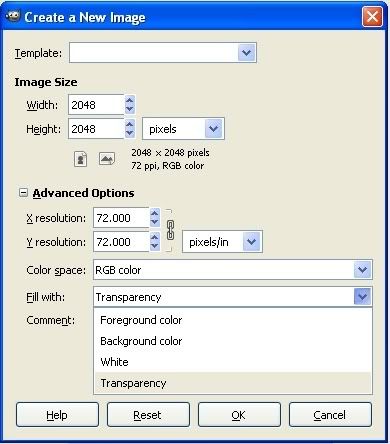
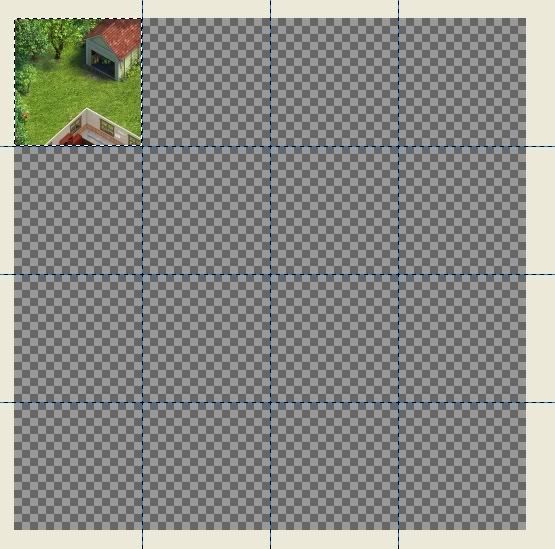
Open GIMP, choose File -> New. On the Create a New Image Window, set the image size to 2048 x 2048 (the size of the full map in the game.) Click the plus sign by Advanced Options and change the "Fill with" to "Transparency." This makes the background transparent. In GIMP, transparency is indicated by the gray checkerboard. Any time you see that, you know that it will be invisible in the game.
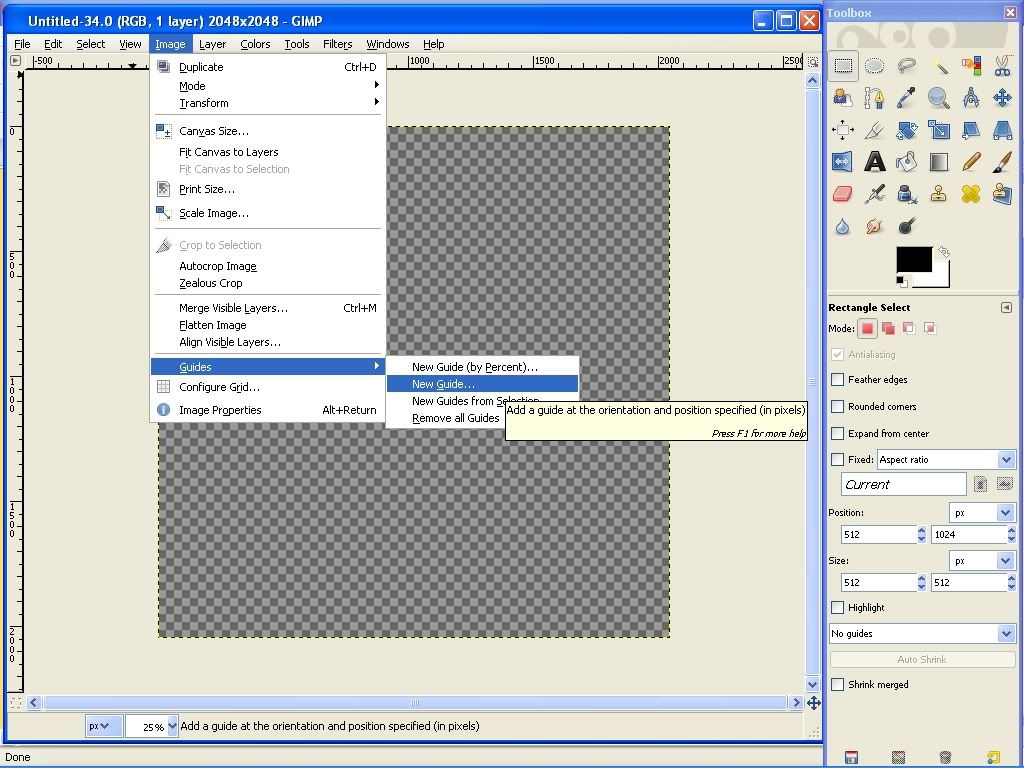
Now we want to set up guide lines that will show us where the map divisions are. This will make it easier to place the original map pieces and will also make it easier and faster to separate our maps when we are ready to put our mods into the game. Use Image -> Guides -> New Guide (NOT by percent.) Each map piece is 512 x 512, so we will set guide lines at increments of 512 both horizontally and vertically. Type in "512" for the position of the first horizontal guide.
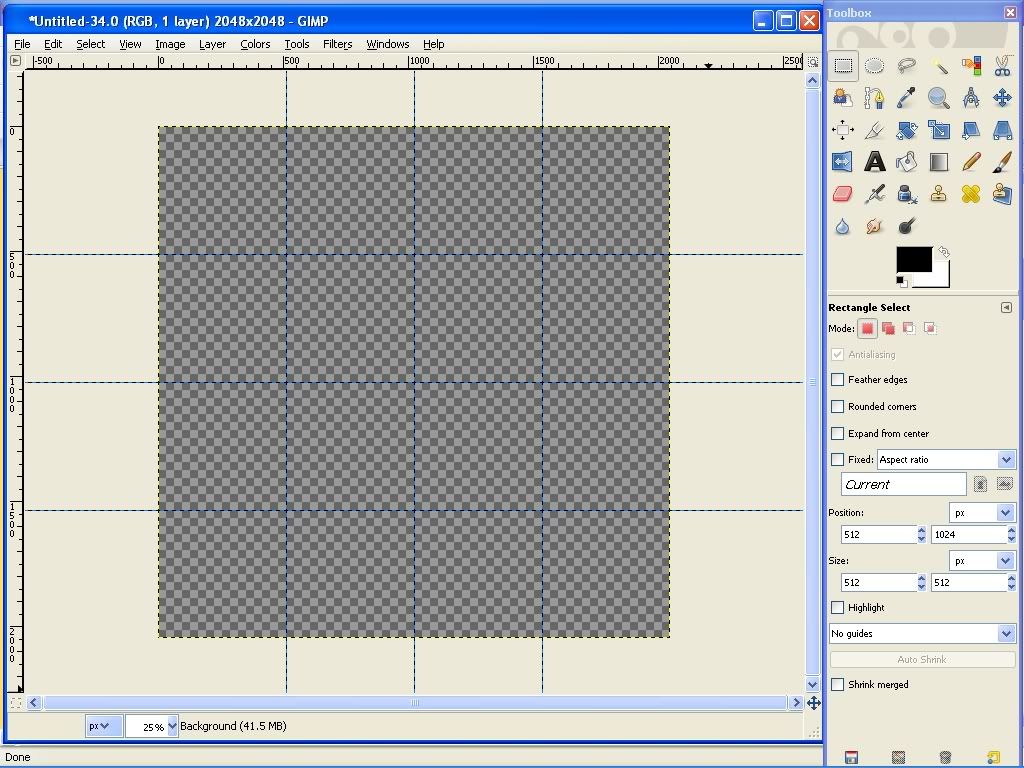
Set another guide at 512 but change the drop down to "Vertical." Continue setting guides both horizontally and vertically at increments of 512 (1024, 1536.) You should have a grid of sixteen equal squares.
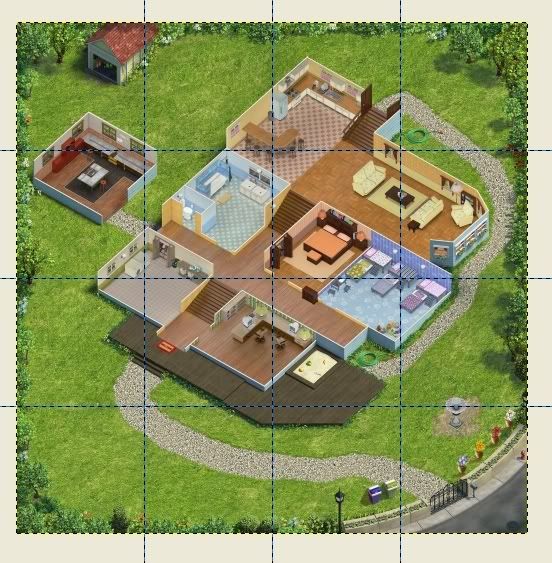
You are ready to begin inserting the background map pieces. Use File -> Open and navigate to the images folder. Choose MapX0Y0 and open the file. Use Edit -> Copy to copy the image to the clipboard. Minimize or close that map piece and return to your grid with guidelines. Use Edit -> Paste. The image will appear with a flashing dotted line around it, indicating it is selected. (The flashing line is called "marching ants.") When you have something selected in GIMP, any edits you make will ONLY be made inside the "marching ants." When you hover your mouse over the current selection, you should have the directional arrows cursor indicating that you can click and drag to move the image. Click and drag to position the image in the top left corner. When you hover outside of the "marching ants" the cursor will turn into an anchor, indicating that a click will "anchor" the selection down into place. Don't anchor it until you are sure you have it in the correct location. Save your work in the standard GIMP format xcf so that you can add layers later and your transparency will be maintained. Don't forget to do this every so often or you will end up very annoyed with yourself.

Open MapX1Y0 and repeat the steps above to place it on your background map. The guidelines should make it easier for you to insert the pieces in the correct locations. Continue until you have all sixteen map pieces placed. You now have your background map complete (you don't have to do this again) and are ready to begin modding. Save your map and do not ever change this background layer. All changes to this image should be made on new layers.


 Previous Topic
 Index
Index